MF135 brake repair and lower links modification
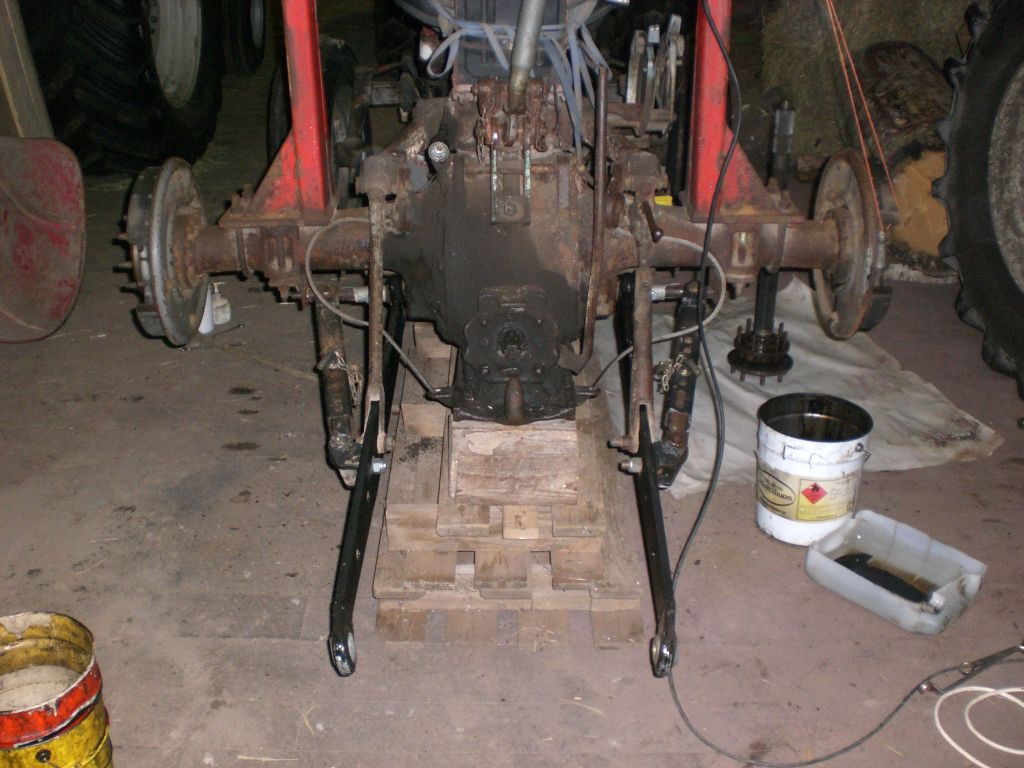
I have jacked the Massey Ferguson 135 back end up and taken the rear wheels off. The 135 original rear wheels are with 6x616 mm bolt circle between the center disk and the rim. I will install a pair of newer rims with 14,9R28 tyres on and keep the original red centers. Previously these rims served as the front wheels of our Volvo BM Valmet 805 (pre Valtra); It shares the same 6x616 bolt circle. The new larger tyres come very close to the mudguards so I move the guards a bit higher. It makes this cabless tractor more secured too.
The lower link arms were also a bit short considering the larger wheels. So I've already installed longer ones, that are MF 565 old arms. I welded new ball heads on them and the arms are now 7 cm shorter than in 565, but 7 cm longer than original 135 arms with CAT1 (22 mm) ball heads. The new bull eyes are CAT2 (28 mm) and now I can mount the same machines than those I use with my bigger tractors. Made also special brackets for the new telescopic limiters to give them sufficient space to move.
I've already removed the right side drive shaft and wheel hub. I'll check and clean the brakes. There's also an oil leak, that takes out the braking on the right wheel.

For the link arms Massey Ferguson 135 and 35 have 22 mm thick pins fastened with nuts inside the axle tubes alias "trumpets". Now I've there two 21/27 mm water pipe stumps, the other as a adapter sleeve over the original worn 22 mm pin for the link arm's 28 mm ball. On the end of the other stump is welded a pin, that fits inside the hole of the original chain link limiter.
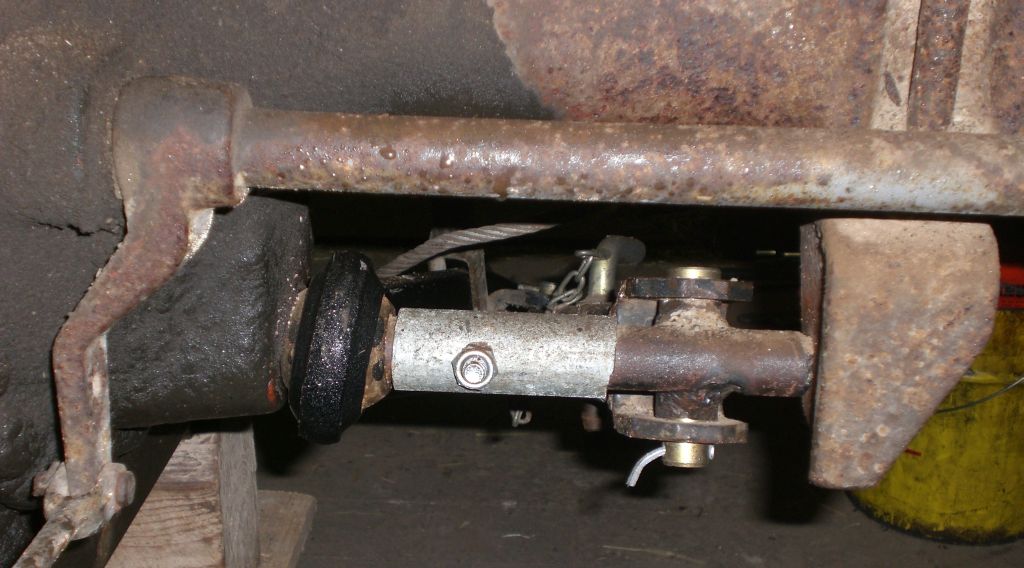
A little larger water pipe stump and a bolt keep the smaller pipes in place. Downside of the stump is cut open, so using the bolt I can also tighten the stump over the smaller pipes. One pipe stump is also welded crosswise for the limiters pin. The limiter is now free to turn in every direction needed.

The last time the brakes were opened was when that safety bar was assempled about 30 years ago. Then were put in new brake shoes with glued brake bands. Maybe the bands were not so good material, cause the braking hasn't been so powerful. Also can be seen a 35/135 typical locking piece for the top link sensor (draft or depth control).

The left side brake is dry and not much worn. The band material is more tough than suitable for braking. On the pic right is a setting screw with a teethed nut, which is adjustable through the opening on the brake shield.

On the right side the drive shaft seal is leaking and the brake band and drum are oily. I changed that seal and cleaned the bands. Then put all together and didn't expect it to become perfect, cause the material has sucked oil. I propably have the original shoes somewhere. I could rivet new bands and put the old shoes in if ever find them. That spring should be on the holes nearer to the setting screw to prevent it to turn by itself. But has been like that for 30 years and nothing have happened.

In the depths you can see the differential and the end of the opposite drive shaft. The right and left drive shafts are end to end, which tightens the conical one per side wheel bearings. The tightness is adjusted right with the shimm plates between the brake shield and the axle tube; Some of the shimms are visible in the pic. Should be no free play on the bearings, but the wheels should still rotate freely. Tightness is about right when back end jacked up and gear off: If you turn one rear wheel, the other should turn the same direction. The gear on the opposite wheel should turn the opposite direction because of the differential. I renewed this inner seal on both sides and hope that the transmission oil stays inside. There isn't any gossip hole, that could let the leaked oil out. The bearing is filled with grease, that would seal the hole anyway.
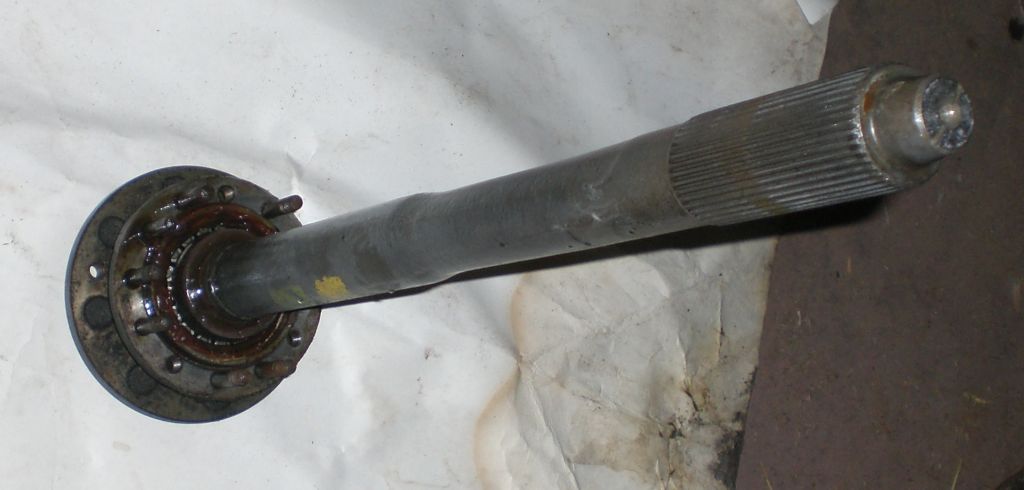
The other drive shaft, bearing and hub.

The outer seal is behind that bearing. The bearing and the wheel is fastened with a shrink ring; The ring must be cut to remove the bearing and the outer seal. The new ring is pressed in hot. I don't do this, I only insert some fresh grease.

The brake drum.

The left mudguard is very corroded and the reinforcing profiles have been full of soil for long.
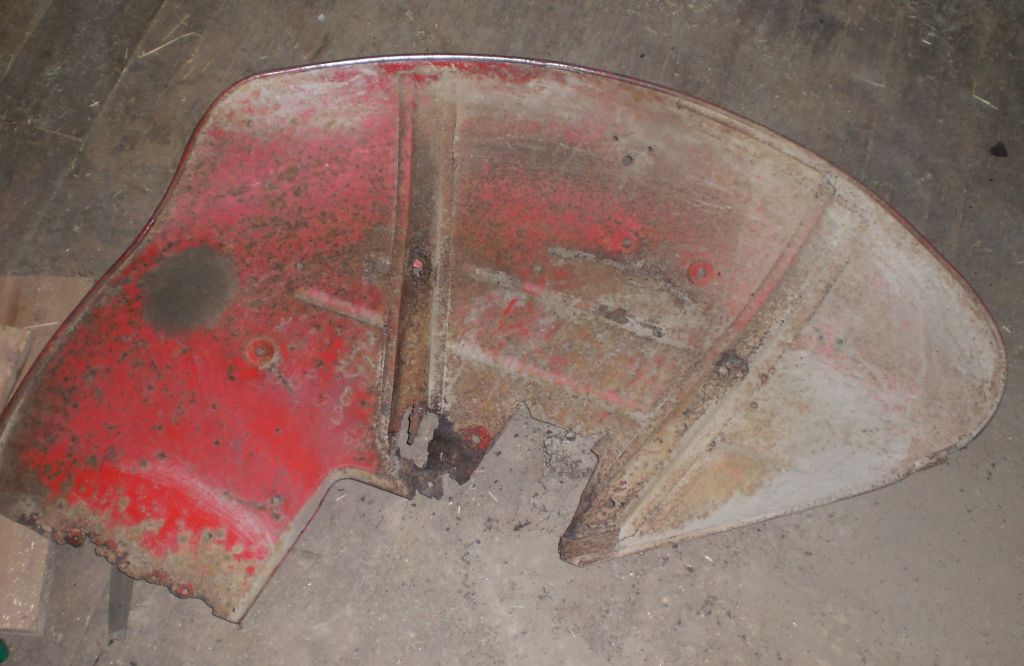
I try to fix this by welding some new steel plate. I also weld a strip of sheet metal on the lowest part to get the mudguard higher. The mudguard was fastened to the safety bar and the original clamp was already cut off. I'll also complete the tractor with more modern parking and turning signal lights and with a 7-pin power outlet socket for trailer.
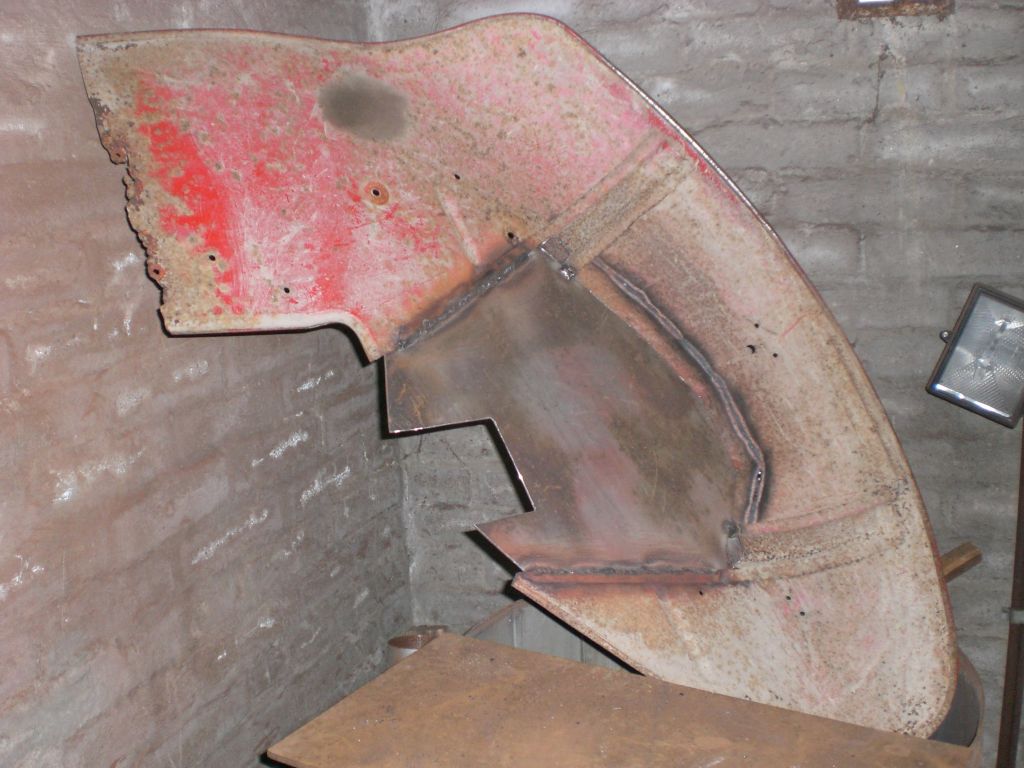
I've welded in a sheet metal patch. New mudguards are available too, but because of the safety bar I would be forced to modify it anyway, so I fix the old one.

I had to bend the patch plate a little, so I first welded the upper joint and bent some and welded some more et cetera et cetera. The lower parts matched fine. At first I welded with some cheapo new to me rutile coated electrodes that was said to be easy to use. The aim was to avoid burning holes to those thin, rusty and dirty sheets. They didn't work fine and I took some more familiar to me OK48 alkali type sticks and welded over the bad joints to make them more uniform. Some sort of handmade look stayed on.
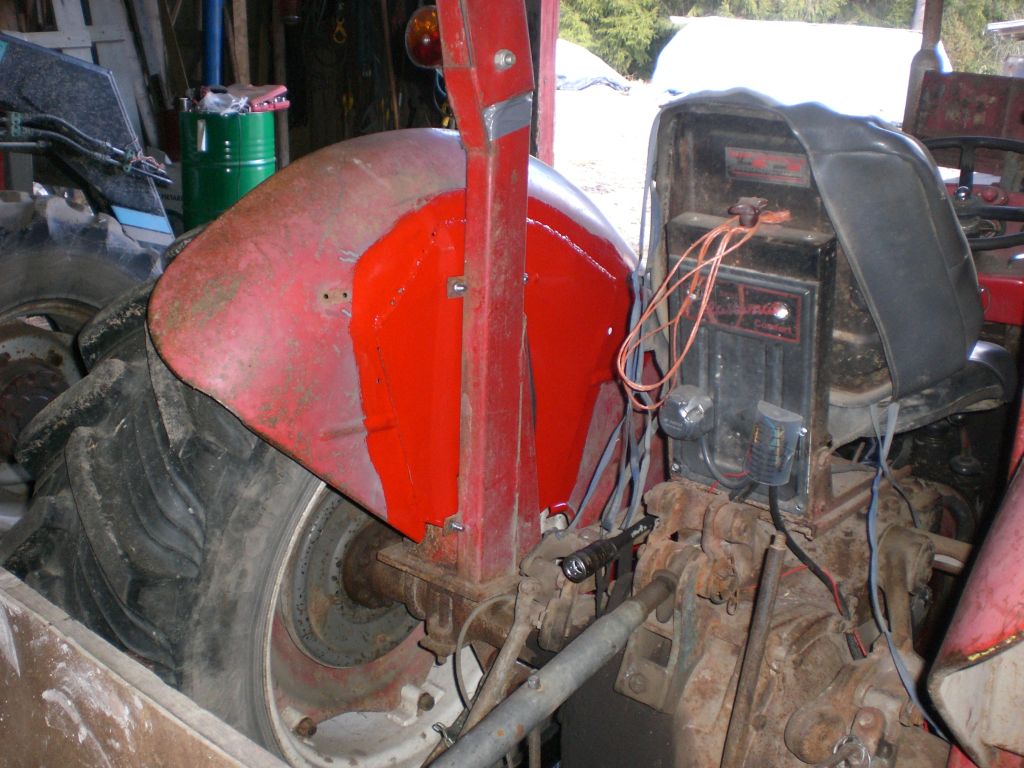
Painted the mudguard shocking red and bolted it to the safety bar and the floor plate. After the photo was taken I've also bolted a toolbox front of the bar. The new lights are fastened to the safety bar; Turning signals, white light forwards and red rearwards, also a working light outside the pic. I made a kind of a distribution center for electric wires on the seat back stand and there is also a power outlet for trailer lights.

Seeding hay with a Juko seeder at spring 2018. The top link on the pic is a bit too short related to the elonged lower arms, afterwards I've bought a longer mixed CAT1/CAT2 top link. The CAT1 ball end suits the 135's 19 mm pin and the other CAT2 ball suits the implement's 25 mm pins. The brakes work surprisingly fine, also the oily side. They are a bit noisy, propably the bands aren't fully adapted and the shoes could withdraw better. Could be some extra spring on the pedals.
Massey Ferguson hydraulicsMain page